This craft is part of the 13 Days of Halloween project. Download number templates for the project, as well as the bug template for Day 3, in the tips and supplies post. Links to all of the crafts from this project can be found in the main 13 Days of Halloween post.
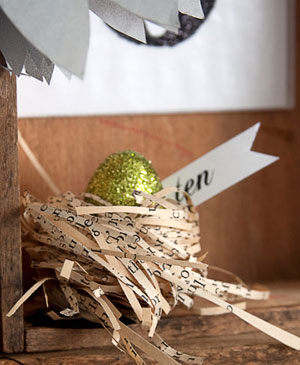
I know that I’m probably not supposed to play favorites with my own crafts, but these book page bird nests with the glittered eggs are top three in my favorite crafts from the 13 Days of Halloween project. I’m already planning to nest a few in my mini Christmas tree, and they’d make great accents for place cards at parties and weddings, though to make enough for a large wedding you’d have to recruit friends and family to help out, assembly line style, because you’d need a lot of glittered eggs and shredded book pages!

Supplies Needed
book pages
craft scissors or a paper cutter
glue dotes (I used medium Zots here)
a 1″ x 1″ (approx.) piece of cardstock
a toothpick
a small plastic robin’s egg (you can find these with the floral crafts at Jo-Ann)
school glue
a small paintbrush
a paper plate or piece of paper
glitter (I used Martha Stewart Golden Beryl)
a hot glue gun (optional)
Instructions
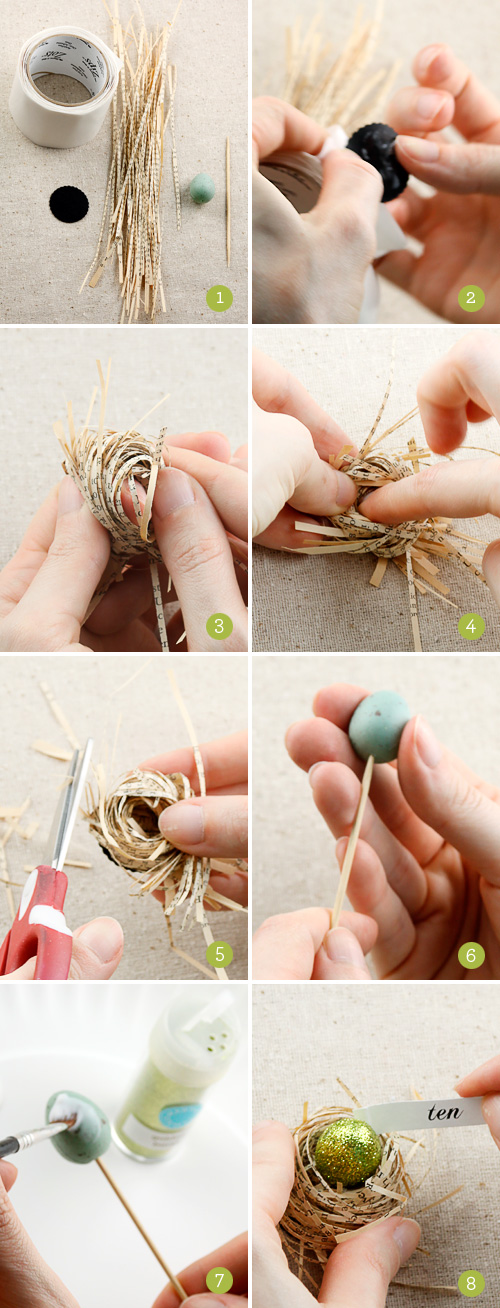
1. Using scissors or a paper cutter, cut very thin book page strips, about 1 1/2 to 2 small paperback pages worth per nest.
2. Cover the top of a 1″ x 1″ piece of cardstock in glue dots (I initially used hot glue, but ended up burning my fingers A LOT during handling – ouch!)
3. Gather the book page strips, aligning the edges as much as possible, and wrap around your index finger, looping the edges of the strips underneath to form a base. Adjust as needed – it takes a bit of finessing.
4. Press the nest onto the glue dot covered cardstock from step 2, using your finger to make a hole in the center of the nest as you press down. You may need to add more glue dots at this point if some of the loose ends start to unravel. If you need more adhesive, you can add a second piece of glue dot covered cardstock to the bottom to catch these loose ends.
5. Trim any remaining loose ends with craft scissors, but be sure to leave some loose pieces so the nest looks more natural.
6. Insert a toothpick into the bottom of a plastic robin’s egg. They typically have a hole in the bottom already, so you shouldn’t have to create one.
7. Using school glue and a paintbrush, paint the entire surface of the plastic egg, and immediately sprinkle glitter over the entire surface, using a paper plate or piece of paper to catch the excess glitter. Set the egg aside and allow the glue to dry. Remove the toothpick after the glue is completely dry.
8. Add hot glue or glue dots to the bottom of the egg, and place into the center of the nest. Slide the calendar number behind the egg, gluing in place, if necessary. If you won’t be handling or moving the nest much, then it’s not necessary to attach the number with glue.
Posted in Tutorials | 5 Comments »

I love this!! If you have access to a non cross-cut shredder, it would be even easier to do this on a larger scale.
posted: October 24th, 2010 at 4:18 pmbeautiful! If you had a styrofoam block or one of those flower arranging block thingies you could stick the toothpick/egg combo upright in it until it dried.
I would love to make one of these on a larger scale and nestle into a corner of my bookshelf!!! Thanks for the inspiration!
posted: October 25th, 2010 at 7:39 amGreat tips, Heather and Cacklin Rose!
Cacklin Rose – I actually used the styrofoam tree form from one of the other tutorials in this series to stick the toothpick/egg combo into until it dried, but I forgot to mention it when I wrote the tutorial. Thanks for reminding me!
posted: October 25th, 2010 at 8:55 pmHi there, I LOVE this! I might try it today. I hope I won’t glue all these shreddered book page pieces to my own fingers …
posted: February 26th, 2011 at 9:17 amJule
These are adorable, found your DIY via creature comforts.
posted: April 1st, 2011 at 6:37 am