This craft is part of the 13 Days of Halloween project. Download number templates for the project, as well as the bug template for Day 3, in the tips and supplies post. Links to all of the crafts from this project can be found in the main 13 Days of Halloween post.
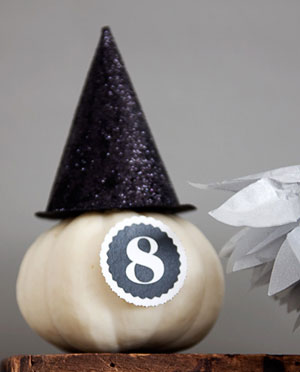
With all of the glitter and glue, these little witch hats are a bit messy but a lot of fun to make. And the result is a neato topper for mini pumpkins. Make a bigger cone and base for the hat, and you’ll have a topper for larger pumpkins, too.
You can also use these mini witch hats as ornaments or as part of a Halloween garland, and small candy can be placed into the cone of the hat before you attach it to the base to reveal a treat on the 8th day of Halloween!

Supplies Needed
a small white pumpkin (2 1/2″ to 3″ diameter is ideal)
glue dots
school glue
a small paintbrush
craft scissors
a 2″ circle paper punch (optional)
black cardstock
mini witch hat template (205Kb PDF)
an Xacto knife
a cutting mat
a large paper clip
a hot glue gun and glue
a paper plate or piece of paper
glitter (I used Martha Stewart Onyx)
Instructions
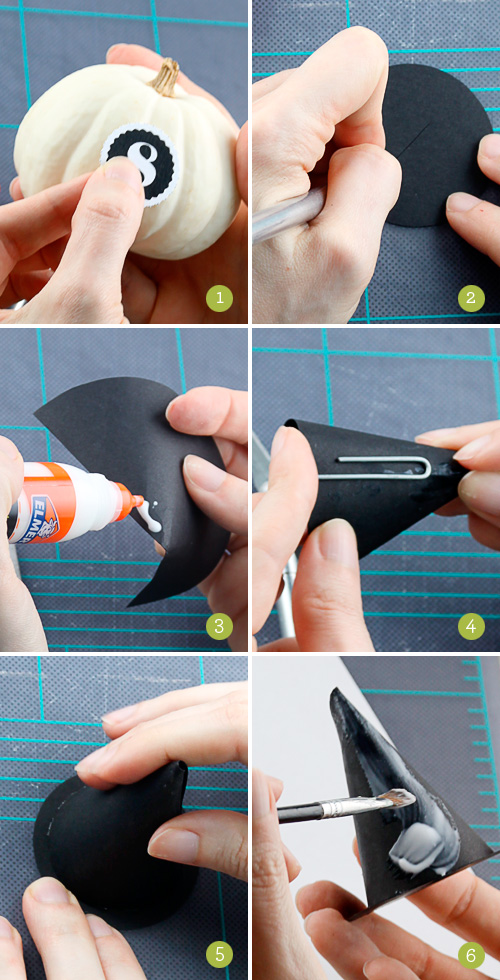
1. Attach the calendar number to the pumpkin with glue dots and set aside.
2. Print the mini witch hat template onto black cardstock (or onto plain printer paper, cut out, and trace onto black cardstock) and cut out along dotted lines. If you have a 2″ circle paper punch, you can use that to quickly punch out the base, instead of cutting it out. Use an Xacto knife to slice an “x” across the center of the base of the hat, making sure the the “x” is large enough to cover the stem of the pumpkin. Bend the four resulting paper flaps inward, and test it on the pumpkin to make sure that it fits over the stem and will sit flush with the top of the pumpkin.
3. Form the witch hat top template into a cone shape, add school glue to one edge, and press the edges together to make the cone.
4. Slide a large paper clip over the glued area to keep it in place while the glue dries.
5. After the glue has dried, remove the paper clip, add hot glue around the bottom rim of the cone, and press onto the center of the base of the hat, holding in place for about a minute, or until the glue cools.
6. After the glue has cooled, paint the entire outside of the hat, top and rim, with school glue. Immediately cover the glue with black glitter, using a paper plate or piece of paper to catch the excess glitter. Tap off remaining excess glitter, and allow the glue to dry. Attach the hat to the pumpkin using glue dots or double-sided tape.
Posted in Craft, Tutorials | No Comments »
