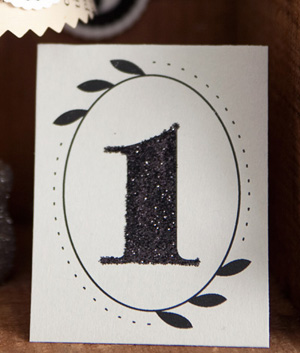
This craft is part of the 13 Days of Halloween project. Download number templates for the project, as well as the bug template for Day 3, in the tips and supplies post. Links to all of the crafts from this project can be found in the main 13 Days of Halloween post.
This is one of those crafts that is both easy and versatile. Similar techniques are used for Days 1, 3, and 6 of the calendar, and you can use the same technique to create everything from glittered greeting cards and envelopes to place cards. Ah, glitter. It’s completely addictive!

Supplies Needed
cardstock
a printer
a piece of paper or a paper plate
glitter (I used Martha Stewart Onyx for Days 1 and 6, and Golden Beryl for Day 3)
small glue dots
2 1/4″ x 3 1/2″ glassine envelope (for Day 3)
2 3/4″ x 2 3/4″ glassine envelope (for Day 6)
a small paintbrush
a toothpick
Instructions
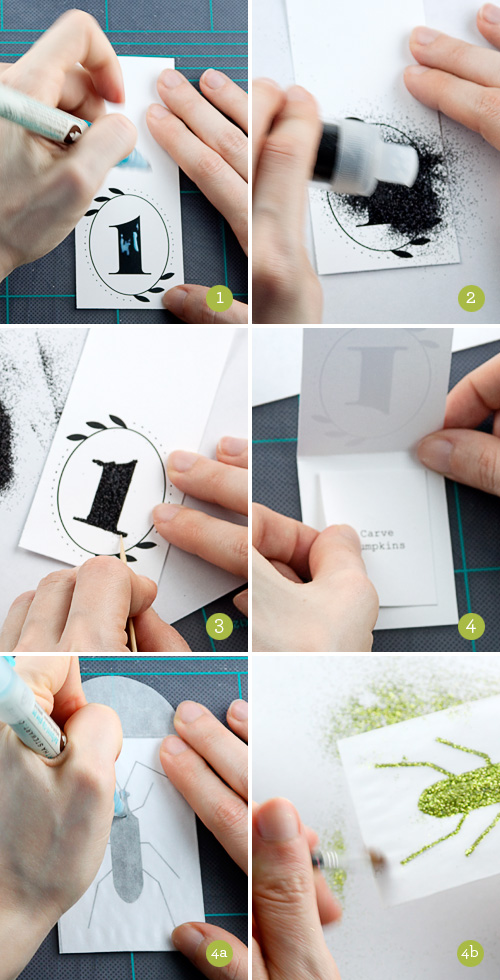
1. Print the number template onto cardstock and cut out along the dotted cut line. Using a ballpoint glue pen (or, if you have a very steady hand, a small paintbrush with school glue), fill the entire number with the glue, working as quickly as possible so the glue doesn’t start to dry.
2. Immediately cover the glue-filled number with black microfine glitter, and shake the excess off onto a piece of paper or a paper plate.
3. If there are any places where you went outside of the lines, then you can easily neaten up those areas using a toothpick to remove the excess glitter and glue before the glue dries.
4. Print or write a Halloween-y message or activity onto a sheet of cardstock, and cut the message out to insert it into the Day 1 card. A rectangle about 1 1/4″ wide x 1 1/2″ high fits perfectly. Attach the message to the interior of the card using glue dots or double stick tape.
4a. For Days 3 and 6, print and cut out the corresponding templates and slide them into glassine envelopes. Use a ballpoint glue pen to color in the entire shape, add lime green colored microfine glitter, and tap off the excess.
4b. Neaten up any “outside the lines” areas using the technique in step 3, and brush off any excess glitter using a small paintbrush. Remove the template and print a Halloween message to insert into the envelope. A 2 1/4″ wide x 3 1/2″ high rectangle is the size for Day 3, and a 2 3/4″ wide x 2 3/4″ high square is the size for Day 6.
Posted in Craft, Tutorials | No Comments »
